A DIY swimming pool is an exciting project that brings summer fun, relaxation, and value to your home. Instead of spending thousands on professional installations, many homeowners choose to build their own pools using affordable materials and simple techniques. These custom backyard oases offer cooling relief during hot months while boosting outdoor enjoyment.
Building a DIY swimming pool allows full control over size, shape, depth, and design. Whether you want a small plunge pool for lounging or a larger area for kids to play, the choice is yours. Materials like above-ground kits, inflatable liners, wooden frames, or concrete blocks make construction accessible.
Many people start with temporary or semi-permanent designs. Intex or Bestway kits serve as entry points. Others upgrade to sturdier wooden or metal-framed pools lined with durable PVC. Over time, some even convert them into in-ground versions.
This guide covers planning steps, material options, safety tips, maintenance routines, and creative upgrades. You’ll learn how to save money, avoid common mistakes, and enjoy a safe, clean swimming space all season long.
 Planning Your DIY Pool Project
Before digging or buying supplies, create a clear plan. Start by choosing the pool’s location. Pick a flat, stable area away from trees and power lines. Shade helps reduce algae growth, but too much limits sunlight needed for warmth.
Measure available space carefully. Sketch a rough layout showing dimensions. Include room for decking, seating, and access paths. Avoid placing it too close to fences or structures.
Check local zoning laws and regulations. Some areas require permits for pools over certain sizes. Rules may cover fencing, drainage, or electrical setups. Compliance prevents fines later.
Set a realistic budget. Include costs for tools, liner, pump, filter, chemicals, and landscaping. Unexpected expenses happen. Add a 10–15% buffer for surprises.
Decide on the type of DIY swimming pool. Above-ground models are easier and cheaper. In-ground versions take more effort but look permanent.
Choosing the Right Size and Shape
Size depends on available space and intended use. Small yards suit circular or oval pools. Larger backyards allow rectangles or freeform shapes.
For families, aim for at least 8 feet wide. This gives room for two swimmers. Depth matters too. Most DIY pools stay under 4 feet for safety.
Round pools are easiest to assemble. They distribute pressure evenly. Oval or rectangular ones need stronger supports at corners.
Flexible shapes inspire creativity. Use garden hoses to outline curves on the ground. Adjust until it looks balanced.
Keep water capacity in mind. A 12-foot round pool holds about 3,000 gallons. More water means higher chemical and heating costs.
Children’s pools can be smaller. Splash zones under 5 feet work well. Add shade covers or inflatable rings for extra fun.
Plan with future upgrades in mind. Leave space for ladders, filters, or solar heaters.
 Materials and Tools Needed for Construction
The right materials ensure durability and safety. For above-ground builds, galvanized steel or aluminum frames resist rust. Wooden frames use pressure-treated lumber. Seal them to prevent rot.
Pool liners are essential. Vinyl or PVC sheets come in standard sizes. Choose thick gauges (20–28 mil) for longer life. Dark colors absorb heat better.
Support structures include walls and braces. Cinder blocks or timber walls hold backfill soil. Metal stakes anchor above-ground units.
Pumps and filters keep water clean. Submersible pumps work for small pools. Sand or cartridge filters remove debris effectively.
Tools you’ll need: shovel, level, tape measure, utility knife, hose, drill, and wheelbarrow. A tamper compacts soil properly.
Ladders or steps provide safe entry. Inflatable models suit soft-sided pools. Rigid ones fit framed designs.
Ground cloth or padding protects the liner. It prevents tears from sharp rocks or roots below.
Cost-Effective Alternatives and Where to Buy
Save money by sourcing used materials. Check online marketplaces for second-hand pumps or frames. Test functionality before purchase.
Plastic storage tanks double as plunge pools. Food-grade barrels hold 50–200 gallons. Drill overflow holes near the top.
Concrete mixing tubs or livestock troughs work too. Line them if needed. Position on sturdy platforms.
Hardware stores sell bulk PVC sheeting. Cut it to size with scissors. Heat-seal edges for watertight seams.
Local nurseries offer pond liners. They’re UV-resistant and flexible. Brands like EPDM last years.
Buy kits during off-season sales. Retailers discount inventory in fall or winter. Stock up early for spring builds.
Compare prices across suppliers. Online stores often beat brick-and-mortar pricing. Read shipping policies first.
DIY doesn’t mean low quality. Smart shopping delivers strong results.
Step-by-Step Guide to Building a Simple DIY Pool
Begin by clearing the site. Remove grass, rocks, and roots. Level the ground with a shovel and spirit level. Uneven bases cause wrinkles or leaks.
Lay down protective padding. This shields the liner from damage. Smooth out folds and creases completely.
Assemble the frame according to instructions. Connect panels tightly. Use bolts or clips as specified. Reinforce weak joints.
Install the liner gently. Drape it over the frame slowly. Avoid stretching or puncturing. Let excess hang over the edges.
Fill with water gradually. Start at one corner to help the liner settle. Adjust as it expands.
Attach the pump and filter. Follow manufacturer directions. Prime the system before turning it on.
Add a ladder or steps. Secure them firmly. Test stability before allowing use.
Trim excess liner once the pool is full. Leave enough to tuck under coping or top rails.
Common Mistakes to Avoid During Assembly
Rushing leads to errors. Take time to level the base. Even a slight slope causes water imbalance.
Using thin or damaged liners risks leaks. Inspect every inch before installation. Patch small holes immediately.
Over-tightening frame connections warps parts. Follow torque guidelines. Hand-tighten unless specified.
Skipping ground prep invites problems. Roots or stones poke through over time. Always use padding.
Failing to secure the pool allows shifting. Anchor it with stakes or sandbags. Wind and water pressure move lightweight units.
Connecting pumps incorrectly reduces flow. Ensure intake faces downward. Keep filters clean from day one.
Ignoring chemical balance harms swimmers. Test pH and chlorine weekly. Imbalanced water irritates skin and eyes.
Prevention beats repair every time.
 Safety Tips for Your DIY Pool
Safety must come first. Install a fence around the pool. Four-sided barriers with self-closing gates meet most codes. Height should be at least 4 feet.
Use a pool cover when not in use. Solid covers prevent accidental falls. Mesh safety covers drain water but block access.
Keep rescue equipment nearby. Have a reaching pole, life ring, and first aid kit ready. Post emergency numbers clearly.
Supervise children at all times. Never leave kids unattended—even in shallow water. Teach basic swimming skills early.
Limit night swimming without proper lighting. Install waterproof LED lights around the perimeter. Motion-sensor path lights improve visibility.
Avoid electrical devices near the pool. Keep radios, phones, and chargers away from edges. Use GFCI outlets for pumps.
Educate everyone on pool rules. No running, diving in shallow areas, or horseplay. Clear expectations reduce accidents.
Protecting Against Algae and Bacteria Growth
Clean water prevents health issues. Run the filter daily for 6–8 hours. Circulation stops stagnation and cloudiness.
Test water chemistry twice a week. Ideal pH is between 7.2 and 7.6. Chlorine levels should stay at 1–3 ppm.
Shock the pool weekly. Use non-chlorine or chlorine shock after heavy use. It breaks down contaminants.
Skim leaves and bugs daily. A handheld net removes debris fast. Empty the skimmer basket regularly.
Brush walls and floor weekly. Algae cling to surfaces. Use a soft nylon brush to scrub gently.
Backwash sand filters monthly. Cartridge filters need rinsing. Replace media as recommended.
Store chemicals safely. Keep them dry, cool, and out of reach. Mix only as directed.
Healthy water feels clean and looks clear.
 Creative Upgrades to Enhance Your DIY Pool
Personalize your pool to match your style. Paint the outside frame with weatherproof enamel. Choose bright colors or earth tones.
Add floating lights for evening ambiance. Solar-powered orbs charge during the day. They glow softly at night.
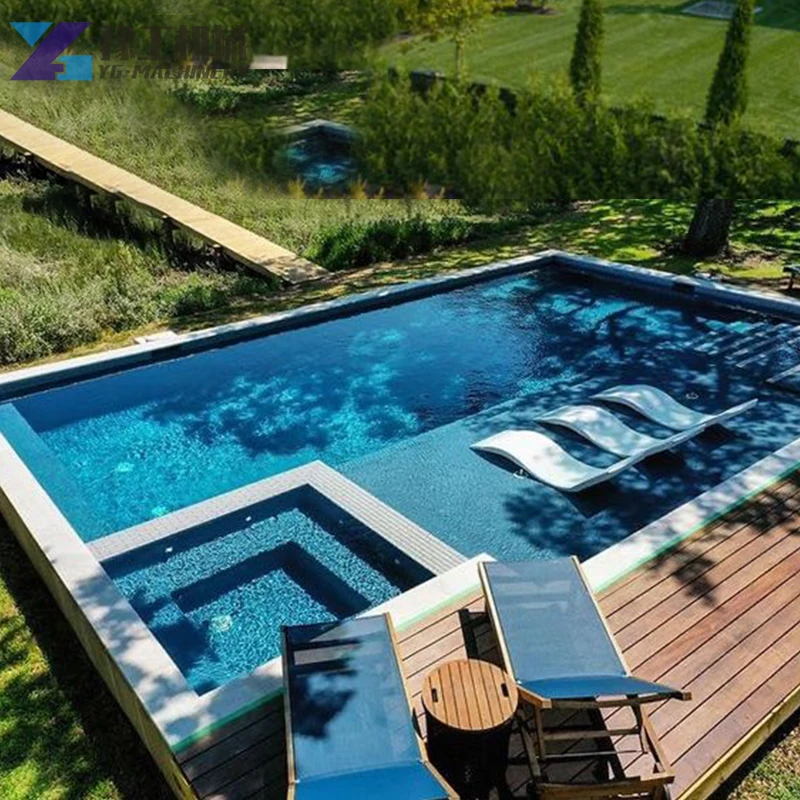
Build a simple deck around it. Use composite boards or treated wood. Include built-in seating or planters.
Incorporate a waterfall or fountain. Small submersible pumps circulate water through tubing. The sound adds calm.
Plant shade trees or install umbrellas. Natural cover reduces evaporation. It also cools the surrounding area.
Hang outdoor curtains or bamboo screens. These add privacy and tropical flair. Tie them back during swim time.
Use themed inflatables. Ducks, flamingos, or drink holders boost fun. Rotate them weekly for variety.
Turn your DIY swimming pool into a backyard retreat.
Adding Comfort and Convenience Features
Comfort improves enjoyment. Add cushioned lounge pads around the edge. Use marine-grade foam with vinyl covers.
Install a shade sail or pergola. These block UV rays without enclosing the space. Adjustable arms control sun exposure.
Use a solar blanket to heat water. It traps heat from sunlight. Roll it up when swimming.
Set up a snack station nearby. A cart with towels, drinks, and sunscreen saves trips indoors.
Add Bluetooth speakers. Waterproof models stream music safely. Mount them away from splashes.
Create a changing area with a pop-up tent. Store swimsuits and dry clothes inside. Privacy matters for guests.
Label chemical containers clearly. Prevent mix-ups during maintenance.
Small touches make big differences.
Frequently Asked Questions About DIY Pools
Can I build a DIY swimming pool on a budget?
Yes. Simple above-ground designs cost 200–800. Used parts lower prices further.
Do I need a permit?
It depends on your location. Check city or county rules. Temporary pools may be exempt.
How long do DIY pools last?
With care, 3–8 years. Liners wear out first. Frames last longer if maintained.
Can I leave it up year-round?
In mild climates, yes. Drain and cover in freezing areas. Frost damages water-filled systems.
Are inflatable pools considered DIY?
Yes. They count as temporary DIY options. Combine with sandbags or wood borders.
How often should I change the water?
Once per season is typical. Heavy use may require mid-season changes.
Where can I find replacement parts?
Online retailers, hardware stores, and pool supply shops carry them. Save model numbers.
 Final Thoughts
Building a DIY swimming pool is a rewarding project that enhances outdoor living. With careful planning, affordable materials, and attention to safety, anyone can create a refreshing backyard escape.
From initial sketches to final touches, each step brings you closer to summer fun. Whether you opt for a quick inflatable setup or a semi-permanent wooden structure, the benefits are clear. Most importantly, knowing how to build and maintain your pool ensures lasting enjoyment. So gather tools, follow best practices, and dive into the satisfaction of a well-built DIY swimming pool.