Learning how to rig a fishing rod is one of the most essential skills every angler must master. Whether you’re planning a quiet morning by the lake or heading out on a weekend fishing trip, setting up your gear correctly makes all the difference. A properly rigged fishing rod increases your chances of catching fish and reduces the risk of losing lures or breaking lines. Many beginners feel overwhelmed at first, but with clear steps and practice, the process becomes simple and intuitive. From choosing the right line to attaching hooks and sinkers, each step plays a vital role in creating an effective setup. In fact, understanding how to rig a fishing rod not only boosts confidence but also enhances your overall experience on the water. Let’s break down the entire process into manageable parts so you can get started with ease.
 Common Rigs Used by Anglers and When to Use Them
Different fishing scenarios call for specific rigs. Knowing these helps refine your technique when learning how to rig a fishing rod.
Bobber Rig – Perfect for Beginner Anglers
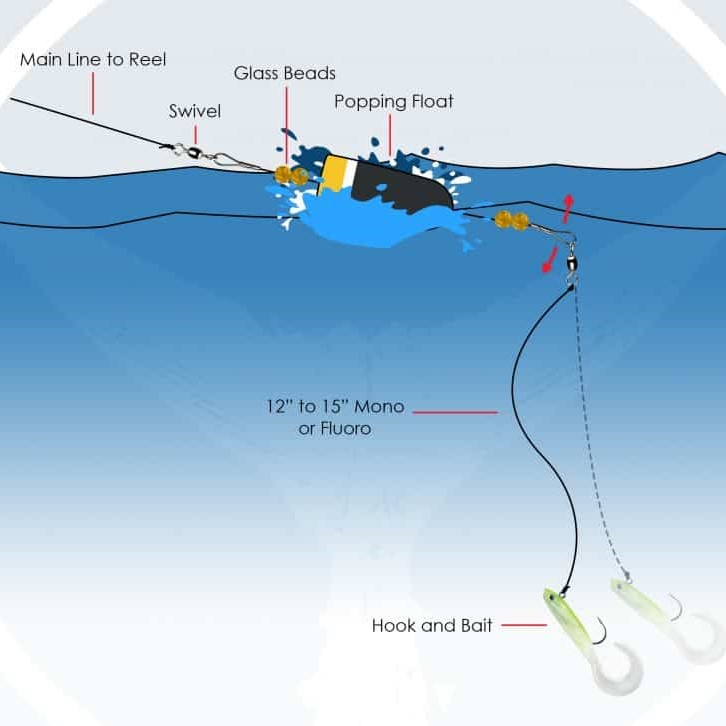
A bobber rig keeps bait suspended at a set depth. It’s great for kids or casual fishing in ponds and lakes. Start with a fixed or slip bobber. Add one or two small split shots 6–12 inches above the hook. Use live bait like worms or minnows. Cast near structure and wait for the bobber to dip suddenly. This visual cue signals a bite. Because it’s easy to see and manage, the bobber rig remains a top choice for those mastering how to rig a fishing rod.
Carolina Rig – Effective for Deep Water Fishing
Popular in bass fishing, the Carolina rig lets your bait move naturally along the bottom. Begin with a barrel swivel. Tie a leader line (18–36 inches) to one end and attach a bullet weight to the other. Use a bead between the swivel and weight to protect the knot. On the leader, tie a worm or creature bait to a hook. This setup allows the weight to stay on the bottom while the lure crawls freely. It excels in murky water or around cover where fish hide.
Drop Shot Rig – Sensitive and Precise
The drop shot rig keeps the bait off the bottom, making it ideal for finesse fishing. Tie a light weight (1/16 to 1/4 oz) to the end of the line. Then, tie a hook 12–24 inches above it using a palomar knot. Keep the hook point facing up so the bait stands upright. Use soft plastics like finesse worms or shaky heads. This method detects even the faintest bites due to minimal resistance. Many pros use it in clear water with pressured fish.
 Preparing Your Fishing Line
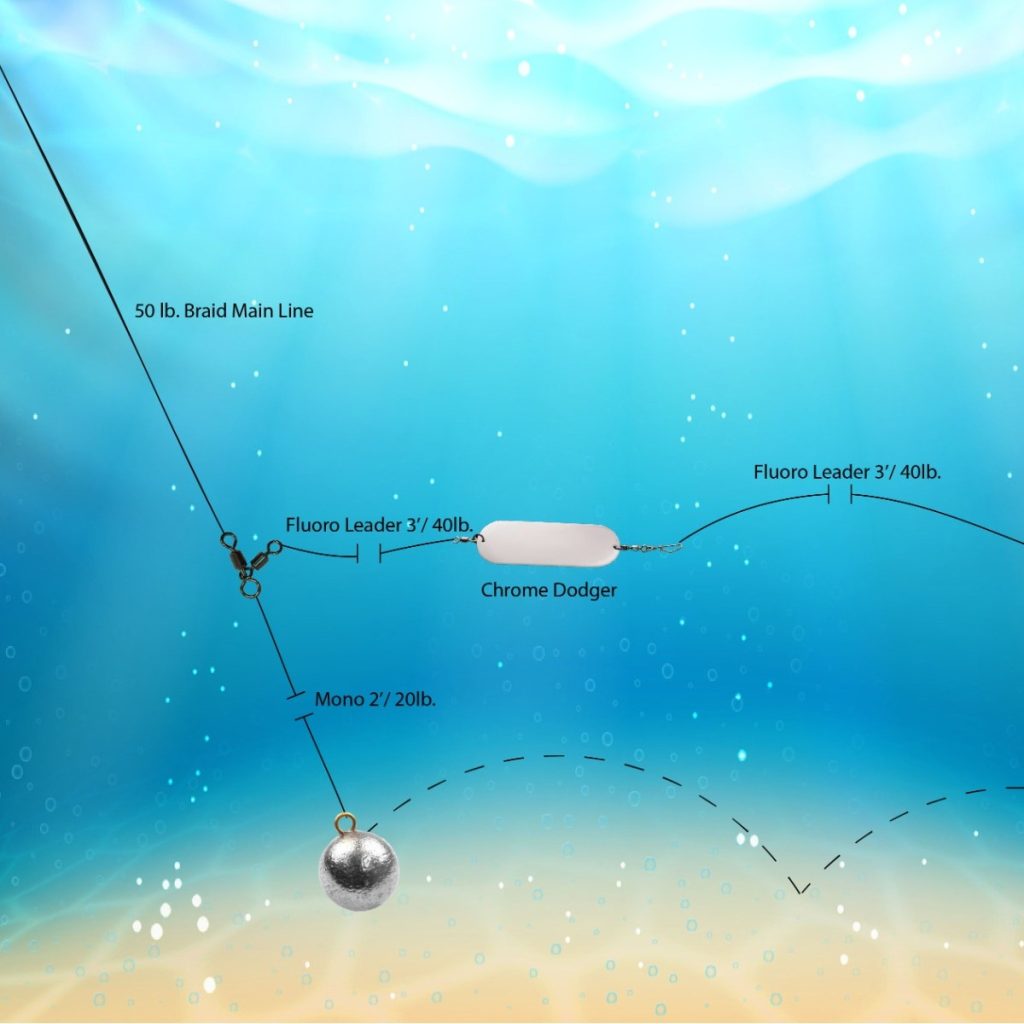
Preparing your fishing line is a critical step in rigging a fishing rod. The line serves as the connection between your rod and the fish, so selecting, spooling, and maintaining it properly is essential for a successful fishing experience. Let’s explore the detailed steps of working with fishing lines.
Selecting the Right Fishing Line for Your Needs
Choosing the correct fishing line impacts casting and catching efficiency. Here are the main types:
- Monofilament Line: Affordable, versatile, and easy to handle. Ideal for beginners and most fishing conditions.
- Fluorocarbon Line: Invisible underwater, resistant to abrasion, and perfect for clear water.
- Braided Line: Strong and durable. Best for heavy cover and targeting large fish.
Match the line type to your fishing environment and targeted fish species. Consider factors like water clarity, fish size, and technique.
How to Spool the Fishing Line onto the Reel
Properly spooling the line ensures smooth casting and prevents tangles. Follow these steps:
- Attach the Line: Tie the line securely to the spool using an arbor knot.
- Start Spooling: Hold tension on the line and turn the reel handle to begin spooling.
- Fill Properly: Fill the spool to about 1/8 inch from the edge. Avoid overfilling.
- Check the Alignment: Ensure the line comes off the filler spool the same way it enters the reel.
Spooling correctly reduces friction and enhances performance during casting.
Tips for Checking Line Strength and Condition
A strong and well-maintained line improves durability and fishing success. Follow these tips:
- Inspect for Damage: Check for frays, cuts, or weak spots before every use.
- Test Strength: Apply gentle pressure to ensure the line holds firmly.
- Replace When Worn: Change the line regularly to avoid breaks during fishing.
Maintaining your fishing line prevents unexpected failures and ensures a smoother fishing experience.
 Attaching the Reel to the Rod
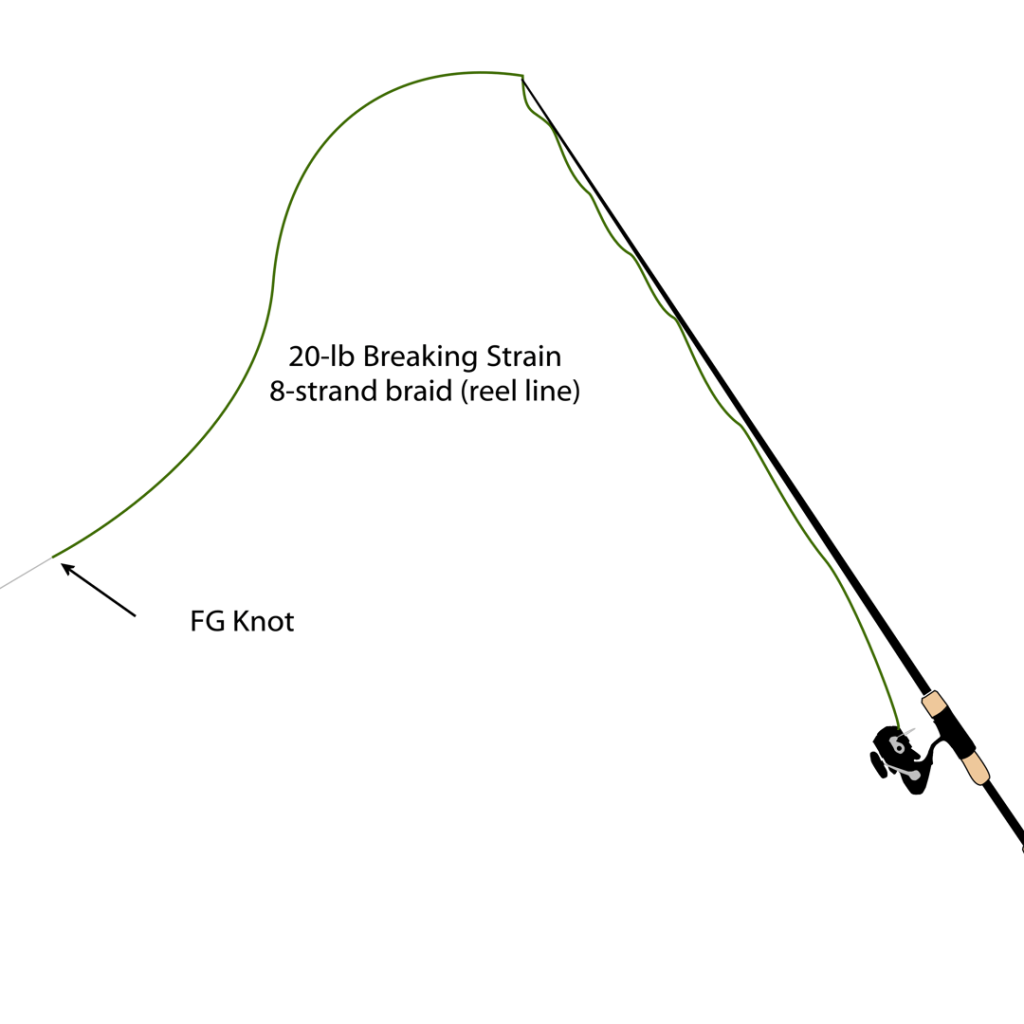
Properly attaching the reel to your fishing rod is vital. The reel acts as a key control for your fishing line. A correctly secured reel ensures smooth casting and reeling. Let’s explore the different reel types and a step-by-step guide to attaching one.
Different Types of Reels and Their Features
Choosing the right type of reel is essential for your fishing method and skill level. Here are the main types:
- Spinning Reels: Easy to use and versatile. Ideal for beginners and light to moderate fishing.
- Baitcasting Reels: Suitable for experienced anglers. Provides power and control for heavier lures and larger fish.
- Spincast Reels: Beginner-friendly with a push-button system. Perfect for light fishing activities.
- Fly Reels: Used in fly fishing. Designed to hold thick, weighted fly lines.
Select a reel type based on your fishing environment and target species. Match it to your rod for better performance.
Step-by-Step Process for Securing the Reel
Follow these steps to attach the reel firmly to the rod:
- Align the Reel Seat: Place the reel foot into the reel seat on the rod.
- Tighten the Locking Mechanism: Secure the reel by screwing or twisting the reel seat until tight.
- Check Stability: Ensure the reel sits flat and doesn’t wobble.
- Test Reel Movement: Spin the handle to ensure smooth operation.
By attaching the reel correctly, you’ll enhance your fishing setup’s reliability and efficiency. Remember to periodically check the reel’s tightness during fishing to avoid loosening.
Tying Effective Fishing Knots
Learning to tie fishing knots is crucial for secure and efficient fishing. Proper knots ensure that your line, hook, and lure stay firmly connected. Mastering these knots can significantly improve your fishing results.
Common Knots Every Angler Should Know
Certain knots are essential for all anglers. These knots provide strength and reliability:
- Palomar Knot: Strong and simple to tie. Ideal for hooks and small lures.
- Improved Clinch Knot: Best for securing hooks, lures, and swivels.
- Loop Knot: Useful for creating a loop for free lure movement.
- Snell Knot: Excellent for tying hooks to leaders.
- Double Uni Knot: Used to connect two fishing lines.
These knots cover most fishing scenarios and can enhance your setup.
How to Tie a Palomar Knot, Improved Clinch Knot, and More
Mastering knot techniques is essential for both beginners and experienced anglers. Below are step-by-step instructions:
Palomar Knot:
- Double your fishing line to create a loop.
- Pass the loop through the hook’s eye.
- Tie a loose overhand knot with the loop.
- Pull the loop over the hook.
- Tighten the knot firmly.
Improved Clinch Knot:
- Insert the line through the hook’s eye.
- Wrap the line around itself 5–7 times.
- Pass the end through the loop by the eye.
- Insert it through the large loop.
- Moisten and tighten the knot securely.
Loop Knot:
- Make an overhand knot but don’t tighten it.
- Pass the line through the lure or hook.
- Bring the end through the overhand knot’s loop.
- Adjust the size of the loop.
- Tighten the knot fully.
Snell Knot:
- Pass the line through the hook’s eye.
- Make several tight wraps around the hook’s shank.
- Pass the line through the wraps and the eye again.
- Pull to secure the knot.
Double Uni Knot:
- Overlap two lines.
- Tie an overhand knot with one line end around the other line.
- Repeat with the second line end.
- Moisten and pull the knots together.
- Trim the excess.
These knots are efficient and reliable for various fishing needs. Practice regularly to perfect them before you head out to fish.
 Setting Up a Bobber and Hook
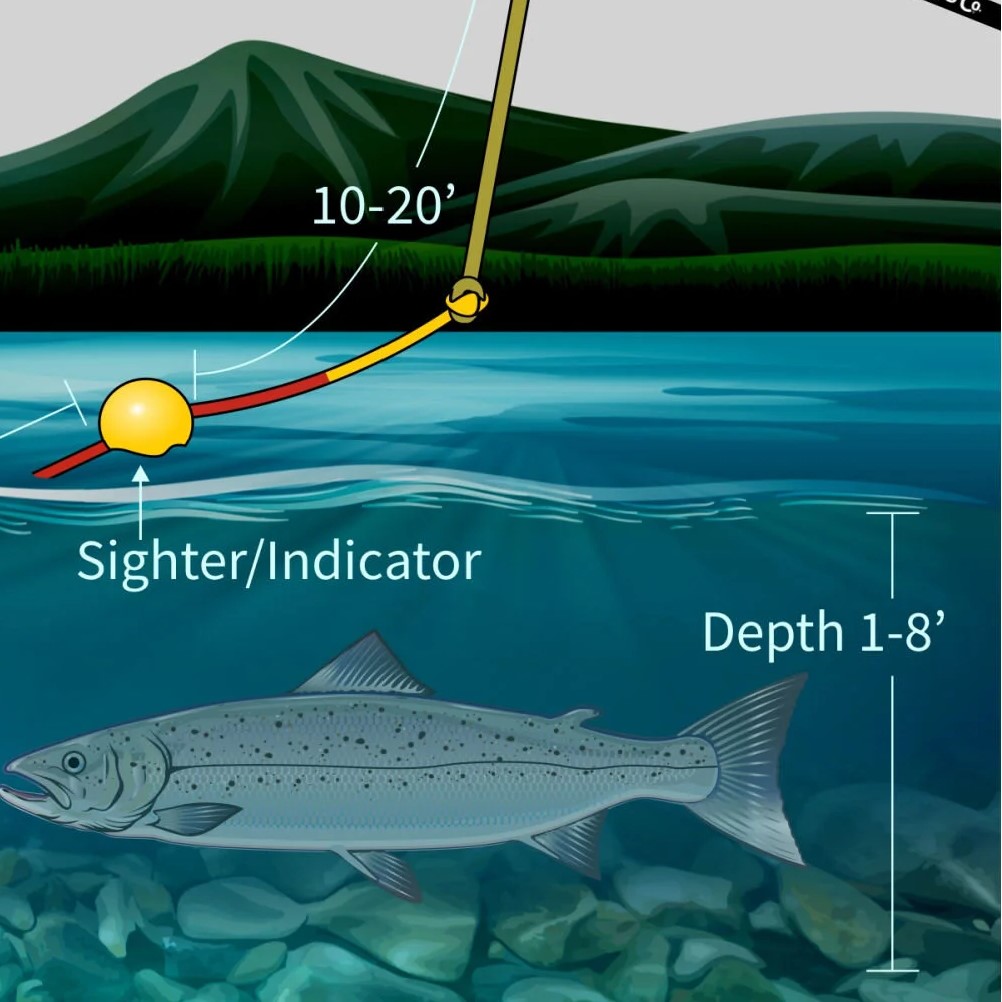
Adding a bobber and hook allows for precise control over bait placement. This setup is excellent for targeting various fish types at specific depths. Properly setting up a bobber and hook enhances visibility and improves your chances of catching fish.
Choosing the Correct Bobber for Your Target Fish
Selecting the right bobber depends on the fish species and fishing conditions. Here’s what to consider:
- Fixed Bobbers: Great for shallow water fishing. They stay in one spot and require minimal adjustment.
- Slip Bobbers: Ideal for deeper waters. These allow for easy depth adjustments.
- Foam Bobbers: Lightweight and versatile for most fishing conditions.
- Round Plastic Bobbers: Beginner-friendly and highly visible for casual fishing.
Choose a bobber size based on the fish’s weight and the bait type used. Larger bobbers suit heavier bait and big fish, while smaller bobbers work for lighter setups.
Step-by-Step Instructions for Attaching a Bobber and Hook
Follow these steps to assemble the bobber and hook setup:
- Attach the Bobber: Secure the bobber to your line. Use clips for fixed bobbers or thread the line through slip bobbers.
- Position the Bobber: Adjust the bobber’s position on the line based on the desired fishing depth.
- Tie the Hook: Use a strong knot to attach the hook to the end of your fishing line.
- Add Bait: Place bait like worms, minnows, or artificial lure on the hook.
- Test the Setup: Ensure the bobber floats properly and the bait hangs at the correct depth.
This setup is perfect for beginners and experienced anglers alike. Always monitor the bobber during fishing for signs of a fish biting. A well-prepared bobber and hook setup make fishing more effective and enjoyable.
Adding Weights for Proper Casting
Adding weights, also known as sinkers, is vital for effective casting. Weights ensure your bait reaches the desired depth and remains stable in moving water. They also enhance casting distance, making them crucial for a variety of fishing techniques. Let’s delve into their importance and how to attach them to your fishing line.
Why Weights Are Important in Fishing
Weights serve multiple purposes in fishing:
- Improved Casting Distance: Weights help cast your line farther, especially in windy conditions.
- Depth Control: They allow you to position bait at specific depths, targeting bottom-dwelling fish effectively.
- Line Stabilization: Weights stabilize your line in currents, ensuring it doesn’t drift off course.
- Increased Bite Sensitivity: Properly balanced weights make it easier to detect fish bites.
Using the right weight enhances control and maximizes your chances of catching fish.
How to Select and Attach the Appropriate Weight
Choosing and attaching the correct weight depends on your fishing needs. Follow these guidelines:
Selecting the Right Weight:
- Split Shot Weights: Great for light fishing and shallow waters.
- Egg Sinkers: Ideal for keeping bait near the bottom in deeper waters.
- Bullet Weights: Commonly used in bass fishing with soft plastic lures.
- Pyramid Sinkers: Designed for strong currents in saltwater environments.
- Bank Sinkers: Suitable for river and ocean fishing requiring steady, heavy setups.
Match the weight type to your fishing environment and target species.
Attaching the Weight:
- Determine Placement: Decide where to position the weight on your fishing line.
- Slide or Clip: For slip weights like egg sinkers, thread the line through the weight’s hole. For fixed weights like split shots, pinch them onto the line using pliers.
- Keep Secure: Ensure the weight is firmly attached and won’t slide unnecessarily.
- Test Setup: Cast the line gently to ensure proper weight balance and function.
Properly attached weights improve your setup’s stability and precision. Regularly inspect weights for damage or looseness, as maintaining them ensures consistent fishing performance.
Frequently Asked Questions About How to Rig a Fishing Rod
Here are answers to common concerns beginners have when setting up their gear.
Q: Do I need different rods for different rigs?
A: Not necessarily. One medium-power spinning rod works for many setups. Upgrade later based on specialization.
Q: Can I reuse old line when re-rigging?
A: Only if it’s in good condition. Look for cracks, stiffness, or discoloration. When in doubt, replace it.
Q: How long should my leader line be?
A: It varies. For fluorocarbon leaders, 18–30 inches is typical. Adjust based on clarity and depth.
Q: Should I wet the knot before tightening?
A: Yes. Moistening reduces heat and friction, preserving line strength.
Q: What’s the easiest rig for a total beginner?
A: The bobber rig with a worm and split shot is simple, effective, and fun to use.
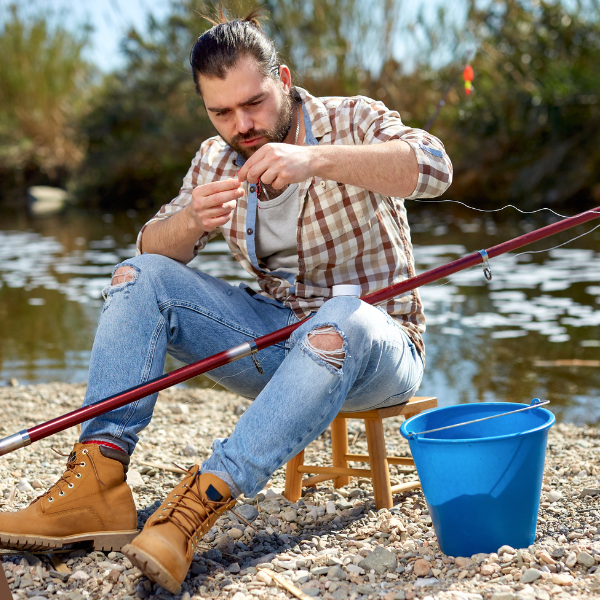 Final Thoughts: Building Confidence Through Practice
Knowing how to rig a fishing rod opens the door to countless hours of enjoyment on the water. It empowers you to adapt to changing conditions and target different species with confidence. While the process might seem detailed at first, repetition turns it into second nature. Each time you tie a knot or adjust a sinker, you gain valuable experience. Over time, you’ll develop preferences and refine your methods. Most importantly, a well-rigged rod increases your chances of success and makes fishing more rewarding. Whether you’re teaching a child or exploring solo adventures, mastering how to rig a fishing rod remains a fundamental skill every angler should embrace.